The Process in detail
- S Lux
- Jan 28, 2021
- 5 min read

Updated: Feb 2, 2021
Bread making can take a few hours, or it can take more than a day.
....and guess what, the good stuff takes longer !

I know this article is a bit long, but it should give you a general idea of how this all goes.....over all you will see that this is very simple.
I posted a cheat sheet that takes all of the below down to simple bullet point steps. For now go through this and then you can use the cheat sheet as a simple guide as you bake.
Mix, wait, shape, wait, bake......
There are 5 parts to the process
Autolysis Final Dough-in Rise Divide, Shape & Proof Bake
Autolysis (takes 30 minutes) just means adding the water and flour together for about 30 minutes.
This allows the flour to absorb the water and helps with the process so that the flour can absorb to water. It does a few other things to help with Gluten development and color.....if you are really curious I added some info at the bottom of this page ***:
Note that the water temperature should be about 90° to 94° F. Your final mix will be somewhere near 75° to 78°.
Useless fact: And as far as how you pronounce it.....I say it : auto-L-Eye-sis .....the dictionary says : ôˈtäləsəs....honestly, who cares....we're here to make bread !!
Final dough-in (takes 5 minutes)....you add salt and levain to the water and flour mix...that's it
just know that adding salt slows the fermentation process down. We don't want to rush the process in order to get all the complex flavors that we are looking for.
Rise (5'ish hours...depends on recipe).....You will fold and wait for the final dough to double in size.
You should let the covered dough rise in a warm place that is around 70° F.
The important part during the rise is to do the folding 3 to 4 times during the period. Exactly when you fold is not too important as long as you get a couple of times done in the first hour.
During the folding you are aligning the gluten so that the gasses that the levain produces are captured inside the dough......so as you can imagine, this is an important step.
The folding process is a gentle pull back up and fold over process. Here is a good How-To video to see what I mean
My Experience: I fold at 10 minutes after I add the salt and Levain, then two more times in the following hour, a forth in the next hour.....then just leave it alone.
Divide, Shape & Proof (15 minutes then Overnight...depends on recipe) ....This is where we let the bread slowly develop it's flavors.
So before you let the dough proof, you will take the dough that has been rising, divide it into two equal parts, shape it and place it in your proofing baskets.
Shaping the dough is like folding it, but you are sort of tightening up the dough. The process removes a bit of the air, but you don't want to press it together like a snowball because you'll end up pushing out all the air. You want to sort of tuck doung into itself from below until you get a nice smooth top.
The Shaping process: a good video on how to divide and shape your dough
After shaping don't forget to place the dough in the basket with the folds on the bottom. More on why this is important later.
My Experience: New proofing baskets tend to stick for the first couple of times. Make sure that you add plenty of flour before placing the dough in them.

Now it's time to let the bread proof and develop the taste that we love. Per the recipe, you will place the baskets in the fridge or other spot and let it SLOWLY rise again.
Proofing: Where, at what temp and for how long depends on the recipe. Breads that use levain need time to develop taste in the bread, so a longer slower proof is best. The cold temperature of the fridge will help with that.

HINT: I use the linen basket covers above the dough instead of under the dough. I use lots of flour inside the basket and that give me a great design....plus the linen seems to allow just the right moisture to stay in the bread while proofing
Bake (2 hours....including preheat) ....45 minute preheat, at 475 F...30 minutes cover on, 10 minutes cover off
Preheating the oven WITH the dutch ovens inside is very important. You need them to be super hot so that the water will steam inside them and allow for the crust to develop
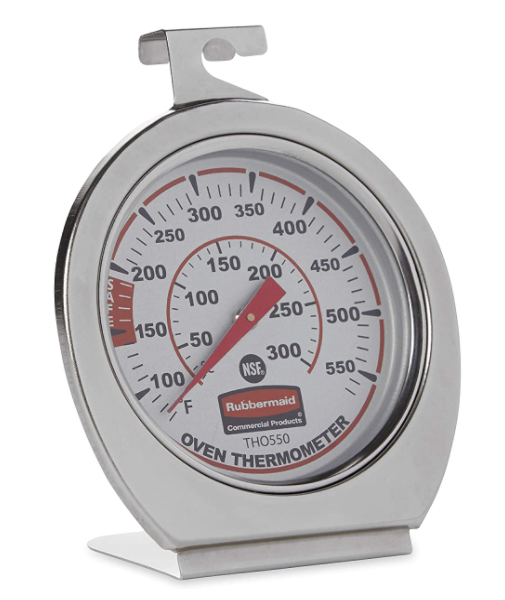
My Experience: Ovens are never correct, so it is good to get a separate oven thermometer to check what your actual temperature is. Mine for example is 25 degrees under what it says ....so I always set my oven to 500 instead of 475
So, now that your ovens are hot:
Take out one of the breads from where you are proofing them, and dump them onto a floured counter top.

HINT: I use my fingers to "Carefully" pull the dough away from the basket. You do not have to go too deep....just the edges. Then I flip the basket upside down and let one edge hit the counter and the bread should fall out. If it sticks just gently help it unstick.

When you dump out the dough after proofing, it will have the "folds" (the ones that you created while shaping the dough).....and these will be facing up and that is how you will place it in the dutch oven. The folds are where it will split during baking.
Hint: I add some fresh flour to the baskets just after dumping the bread and store them like that . DO NOT clean off the flour.....you want it to be there next time so that nothing sticks.
Now the Hot part :
Remove the dutch oven from the oven and open the lid
WARNING: Make sure you are extra careful when moving the dutch ovens in and out of the oven. I always leave my pot holders next to a hot pot to avoid grabbing them bare handed !!
Quickly and gently place the bread inside the dutch oven ( that is super hot so careful)
Close the lid and return it to the oven
Do that for the other bread and set a timer for 30 minutes
After 30 minutes remove the lids from both dutch ovens and bake for another 10 to 15 minutes.

After the additional 10 to 15 minutes you should see some real nice color. Don't worry if it gets dark, it will be great !

Remove the breads from the oven and place them on wire racks to cool.

Now the really hard part ....... WAIT 20 MINUTES .
The bread is still cooking and needs to cool before you cut it. The dough is so soft at this stage that you will damage the slice and all your hard work.
Storing the bread
Once the bread has fully cooled (about 3 hours), I store it in a plastic bag. This type of bread will easily last 4 or 5 days due to the complex and extended proofing time. This is no baguette that goes hard by the end of the day! Of course the bread is so good, that it does not typically last that long.

That's it !! Enjoy
Here's a little bonus info:
So you want to know what happens during autolysis ?
The flour fully hydrates. This is particularly useful when working with whole-grain flour because the bran softens as it hydrates, reducing its negative effect on gluten development.
Gluten bonds begin developing with no effort on the part of the baker, and kneading time is consequently reduced.
Carotenoid pigments remain intact, leading to better color, aroma, and flavor.
Fermentation proceeds at a slower pace, allowing for full flavor development and better keeping quality.
The dough becomes more extensible (stretchy), which allows it to expand easily. This leads to easier shaping, greater loaf volume, a more open crumb structure, and cuts that open more fully.
- King Arthur flour
...Now you know


Comments